Fokker
F-27-500
[ Airfix page 2 conversion ]


Fokker
F-27 model in 1/72 scale
... continued from page 1..
Models of the Fokker F-27 Friendship were discussed on page 1
and here. Although the Airfix kit has its inaccuracies, it is still the
best 1/72 F-27 kit. But for an accurate model, needs some effort.
Another Airfix F-27 kit will by made as a "stretched" Fokker F-27-500 of the Dutch Antillean Airlines or in Dutch: Antilliaanse Luchtvaartmaatschappij (ALM); these were flown in the seventies in the Caribbean with main base at Hato Curacao airport.
 The Airfix
kit was re-issued in 2009 and included an extra sprue with parts for a "long
Fairchild type nose" for the weather radar as well and extra
smaller diameter propellers with squared tips. The nose parts are
separate.
The Airfix
kit was re-issued in 2009 and included an extra sprue with parts for a "long
Fairchild type nose" for the weather radar as well and extra
smaller diameter propellers with squared tips. The nose parts are
separate.


The remainder of parts are unchanged such as the standard kit fuselage, landing gear, nacelles and transparant parts.

The
main inaccuracies of the kit will be tackled and also the conversion done of
the Airfix kit to get a stretched F-27-500 model in 1/72.
The real F-27-500 had a longer cabin with more passenger capacity and
was extended 90 cm forward of the wing and 60 cm aft of the wing. It
also got not 2 but now 4 emergency exits and a large freight door at port
was fitted (and in that door and crew emergency exit as well). There
were thus fewer windows at port.
The longer fuselage needed an extended
main gear strut in order to enable take-off rotation. The actual main strut
extension was about 10 cm. The ALM F-27-500 was otherwise standard.
See information on my special F-27 page here....
I designed custom decals of the Antilliaanse Luchtvaart Maatschappij
(ALM) as flown in Dutch Antilles in the 1970s. The decals for the
airline livery were custom printed, more about those later on.

Routes about 1970 in the Caribbean... Main base was on Curacao island, Netherlands Antilles.

NOTE: in the nineteen eighties the ALM also acquired a pair of
Fairchild FH-227 (FH-227B registered PJ-FHA from June 1988 until
January 1991 and FH.227B PH-FHB from June 1988 until 1992. But those
are quite different).
For the F-27-500 the fuselage of the standard 1/72 Airfix F-27 kit needs to be stretched 12,5 millimeter forward of the wing
and about 8 millimeter aft of the wing. It had the later standard radar Fairchild type nose which
was included in the later Airfix kit release and I had a few spares.
The longer fuselage of the aircraft needed a longer main gear strut in order to enable take-off rotation. The extension was
about 10 cm, so about 1,5 millimeter in 1/72. The struts fold in half and it seems that the
nacelles were unchanged as it fitted inside. So the kit parts were used.
Several additional corrections were done to the basic Airfix kit.
[1] The first matter was to correct the
dorsal fin of the Airfix F-27 kit as it is far too small in surface area. Saw off with the razor saw at each
fuselage half. A new dorsal fin will be made from thick plastic card later.
[2] The rear left fuselage scoop was also removed, it is a bit inaccurate.

[3] The next thing
to tackle was to get better cabin windows. The fuselage cabin windows
of the Airfix kit are very inaccurate and also in wrong position. It was decided to fit long clear
window strips and the fuselage windows rows were removed now with a
Tiger razor saw from each fuselage half.


NOTE: fuselage halves seen above still not lengthened.....
[4] The next difficult task is the fuselage stretch for the F-27-500. A
way to lengthen a fuselage is to make plugs using another kit. I
opted however to stretch the fuselage with plugs made from plastic card and not sacrifice another Airfix kit.
Vertical cuts were done with a blade saw. This is tricky! Ensure perpendicular cuts at 90 degrees.


From
bended plastic card, the 2 circular stretch plugs were made. The front
plug should be 12,5 mm wide and the rear plug 8 mm width. Sand mating surfaces flat.

Inside
the fuselage long card strips were glued to get additional strength and in
the window row opening vertical strips to later receive the clear
plastic row. It all looked rather scary and a big effort to get all sections well aligned...

The
doors were glued closed as well as no new cabin interior will be
installed. The inaccurate rear fuselage side scoop was also removed.
(and you see that the already removed dorsal fin gives some gaps as
well).
I also prepared extra slots at the wing-fuselage joints to accept a metal
spar later on. This is really essential to reduce tensions at the
wing-fuselage joints later on.
[5] The separated nose and rear fuselage sections were joined. The longer "Fairchild type" radar nose parts provided in the Airfix kit were installed for the F-27-500 as well.
Inside the front fuselage, the cockpit interior was set
as per kit.

Of
the cockpit interior not a lot will be seen. It was simply painted
light grey, pilot seat cushions blue and the seats got
straps made from tape.

(TIP: it is better to install the transparant Airfix cockpit window part now which I forgot to get a smoother blended-in
result).
The rear tail halves were are joined and
all the openings closed up. The vertical tail itself is quite good but I will
fill up a bit the rudder gaps.
Now
the front plug was joined with the mid fuselage. Use again inside
bended strips at the vertical joints. Use clamps and ensure alignment;
this is a difficult task. Let dry for 24 hours.

Now a big moment.. joint all large fuselage sections for the stretch..... It looks quite a lot of work is needed.

The
fuselage was now puttied. Sand and redo until the stretched fuselage
looks smooth. I used Alabastine car filler which I hope will not shrink
a lot
over time....

[6] The Airix kit also misses the prominent kink
in the fuselage cross section (at the floor structure inside) of all F-27 aircraft. So this
was also corrected and the missing fuselage cross section kink at
the floor position was suggested with plastic strips glued on the
fuselage
outsides, puttied and sanded.

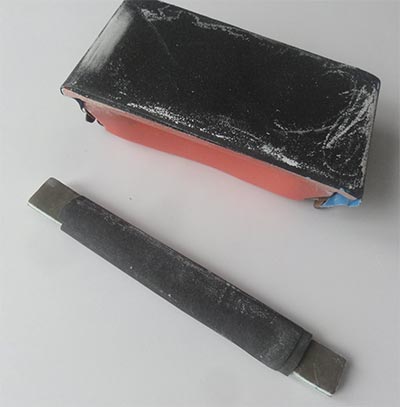
Wet sand all the lot again using a flat sanding block... Several times....
[1A] The inaccurate kit dorsal fin had been removed earlier. A
new required enlarged dorsal fin was made with plastic card and blended in with putty.
[1B] At the rudder base, a missing actuator fairing was suggested with some
card as well.

Wet
sand all the lot again using again the flat sanding block... Several
puttying and sanding passes were needed to get straight surfaces. When
it looked OK....
[3A] For the removed fuselage window rows in scale I used sections of clear acetate sheet.
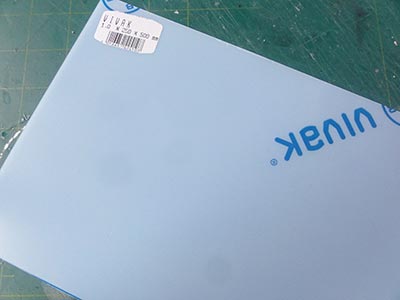
Each
fuselage window row got a
clear acetate sheet strip; it was sanded to size and installed in each
row opening with
normal plastic glue. Try to get a flush joint which is not
easy. Putty was needed to blend in the lot. The clear window rows
were masked temporarily for protection. (sorry, I forgot to make a
photo).
The small amounts of putty was sanded.
The stretched fuselage was set aside and allowed to dry... and shrink.. FOR A COUPLE OF MONTHS.

I looked at photos for
home designing the ALM decals, particularly the cheatlines and will also set a far better windows' pattern.


The
F-27-500 wing was now tackled and it is not different than on a
standard F-27. So the Airfix kit parts were used, but...
[7] The kit still
has a moulded slotted flap which was not present on
any production F-27's. The recess/ flap slot was thus filled with
putty
and sanded. (note: later the thick wing tip pitots were replaced).
The movable parts of ailerons and rudder have a bit
wide gaps. The gaps were filled with some white glue and swiped, making the gaps less visible. Will
be covered by paint later on.

[8] The
F-27-500 has a longer main gear but that would fit folded in the nacelles. The
nacelles were made as per kit and joined
with the wing. Putty and sanding is needed here.
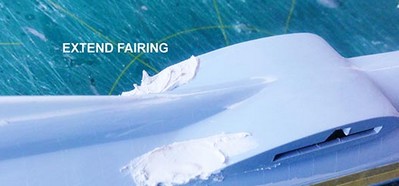
[9] Another small correction needed at the Airfix kit is that the rear fuselage-wing junction fairing should also
be made a bit more prominent, this is the case for all F-27 versions. This was done with some card and putty.

The long clear window strips installed got for the time being a long long masking tapes applied.
The
fuselage and wing halves now got a base grey primer by airbrushing
Revell Aqua 75 steingrau acrylic paint. Masking at the window rows was for the time being done with a single long tape slice.

This
grey coat revealed that the stretched fuselage meanwhile had shrinked a bit... So
again some putty and sanding was needed with sanding block....

Note
that the
cabin windows are still masked with the prepared cut window masks. You
will see a small dent that needs to be filled.
When all seemed OK, I removed the long masking tape from the clear
window stripes.
I designed based on F-27 engineering drawings the window pattern for the cabin windows.
 YOU CAN DOWNLOAD THE 1/72 F-27 window PATTERN BELOW...
My modelling friend Peter cut paper masks with his
mask cutter plotter. Thank you Peter!
The new windows masks were set at the
correct fuselage position over the clear window strips. Alignment is essential. The window
masks are at correct separation distance except near the various doors
and emergency doors. The decals designed and the window masks matched with the cheatlines.
An important milestone was reached, the main model sections were ready and primed.
The next step was the colour scheme for
the ALM F-27-500. I could not really determine the exact
paint colours
but settled for white at: upper fuselage, vertical tail. SEE NOTE BELOW.
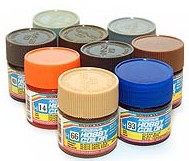
A few semi
matt coats with Revell Aqua 05 white acrylic were airbrushed followed
by a few
coats of Gunze Sangyo H1 gloss white acrylic.
Masking was needed.

The still not installed wing halves and horizontal tailplanes were airbrushed light grey with
thinned Gunze Sangyo Mr.Hobby H324 acrylic paint.
The pneumatic de-icing boots were
masked and airbrushed matt black with Revell Aqua 08 "schwarz".
Some areas on the nacelles were
painted burned metal and the nacelle intake rings painted aluminium by hand.
Some small scoops were suggested as well by dots of black (for the openings). All needed colours were now on the model.
The wing halves were not yet installed. I prepared that a metal spar would be used to get more strength.

The ALM livery was next, first on the fuselage applying my own home designed and custom printed decals. It took a lot
of research and time to design the ALM decals with the cheatlines with
accurate window layout. As the cheatline would be set over the
(masked) clear transparant trips, accurate window rows could be
achieved.
The designed decals were custom laser printed by me with my OKI laser printer.

The window tape masks were removed now as they would be covered
with cheatlines. Than decalling was started. As the decals are
laser printed on one continous decal sheet film, each decal had to be
cut out separately. No other decal preparation is needed. Soak halve a
minute in water and slide from the decal paper onto the model.

Decalling took a lot of alignment effort but while decalling you see the ALM aircraft model emerge.
NOTE:
I had forgotten that below
the cheatlines is also a white area. This was suggested with plain
white decals sheet cut in the correct pattern. So better mask that as well earlier and airbrush.

Any light blue areas that may need painting can be done with a very good matching Revell Aqua 50 "lichtblau"
acrylic paint. The area in front of the
cockpit got this colour and I could not see a black anti-glare panel on photos.
After decalling, the kit cockpit window part #21 was installed. It gave a
few tiny gaps and these were closed with white glue. When dried,
paint the frames and closed edges gloss white.
(TIP: it is better to install the cockpit window part
much EARLIER when putting the fuselage and get a smoother blended-in
result).

Trimming the tail markings woth stripes and logo took some effort. Edges were touched up with paint.
The
various door outlines were also home designed decals but I also used
slices of white decal lines particularly at the extra emergency exits.
Decalling of the fuselage was ready. It looked good!


At this stage the fuselage got airbrushed quite a few coats of semi-gloss varnish with Johnson Future/
Pledge thinned with 10% Gunze Sangyo levelling thinner. This will protect the decals and gives an even sheen, shield off the cockpit wind shield.
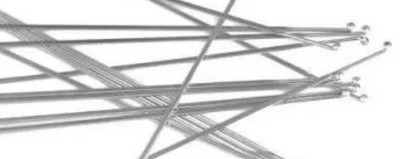
The wings had been prepared and airbrushed. A metal spar is
essential for added strength. The spar and slots had been prepared earlier. The metal spar ensures
correct horizontal alignment and releaves the wing-fuselage joint
tensions. Some superglue was used to fix the metal spar inside the wing halves plastic'.

The Fokker F-27-500 had extended main
landing gear legs of about 10 cm (in 1/72 millimeter about 1,5 millimeter); these were
longer to enable take-off
rotation. The geatr folds before it retracts into the nacelles. See information on my special F-27 page here....
An
error in the standard Airfix kit is that main gear struts are some 2
millimeter too short. So for this longer F-27-500
model the struts were extended about 4 millimeter. This was not done in
the gear struts themselves as not to weaken them but suggested in
the gear bays by adding a 4 millimeter piece of card at the strut
rotation lugs. Inside the nacelle it is not that obvious but will
improve the "sit" of the model significantly. I also added a few
missing extra
main gear strut bars as seen on photos for plastic rod.

The main wheels from the kit were used. I also set a few brake lines
from thin wire, fix with superglue. The engine exhaust were set and
painted burned metal. (you can drill these open if you want).

Some smaller antennas were seen and made from scrap. From bits and plastic sprue.


It seems that a large aircraft registration is also set below the port
wing, so PJ-FRE decal was set. I could not see on photos if a
registration is also located on the upper wing; it was not usual practice so this decal was not
set.


The rather thick kit wing tip pitots were replaced by metal needle bits.
The flap gaps and rudder gaps were accentuated with a pencil for extra depth.
The new set of propellers found in the
later Airfix 2009 kit release
were used. These have squared tips and though still about 1 mm too
small in diameter, it is hardly noticeable. They got medium grey
blades and yellow tips. The anti-icing both were handpainted black.
They were fixed in place with white glue.


A long radio antenna runs from the vertical tail to a stub/ mast at
starboard aft of the cockpit. It was made from scrap and the wire made
with flexible PRYM line. Fix with superglue. A few insulation bits were made with white glue in the wire.


A
few anti-collision lights were painted and got a few drops of Humbrol
Klear Fix to suggest the lights. On the vertical tail, a clear red bit
was set for the light. Some static dischargers were added made from EZ
line, fix with superglue: 4 at each wing tip, 2 at each stabilizer tip
and 2 on upper tail/ rudder.
At the front cockpit windows a pair of wipers were set made of black thin stretched sprue.
The overall model finally got again a few coats of semi-gloss varnish with Johnson Future/
Pledge thinned with 10% Gunze Sangyo levelling thinner. This will protect the decals and gives an even sheen, shield off the cockpit wind shield.
That completed the unique 1/72 scale F-27-500 model in ALM livery.


... set in scenery at Hato Airport Curacao...

... and as black white photo at Hato...

Below
here a real photo of the ALM F-27-500 PJ-FRE name "ST.EUSTATIUS"
(over-exposed photo, the top fuselage is hardly seen....)

Another nice addition in the Dutch Antilles model collection.
Back to 1/72 models.......

(c) Copyright
Meindert "designer"/ All rights reserved. Your comments
are welcomed by webmaster
page created
August 3, 2026


